Quick Guide: Setting up and using waitlists
Please get in touch with your account manager if you would like to get this feature activated.
The waitlist feature can be configured on the account level which means the waitlist feature will be configured on all events in an account. Alternatively, it can be configured on the event level which means you need to turn the feature on for each event in an account.
The waitlist feature will activate for a session when all tickets are sold out for that session.
Customer facing page
When an event/session sells out, customers can join a waitlist by providing their email address.
The customer clicks JOIN WAITLIST and a pop up appears as per below:
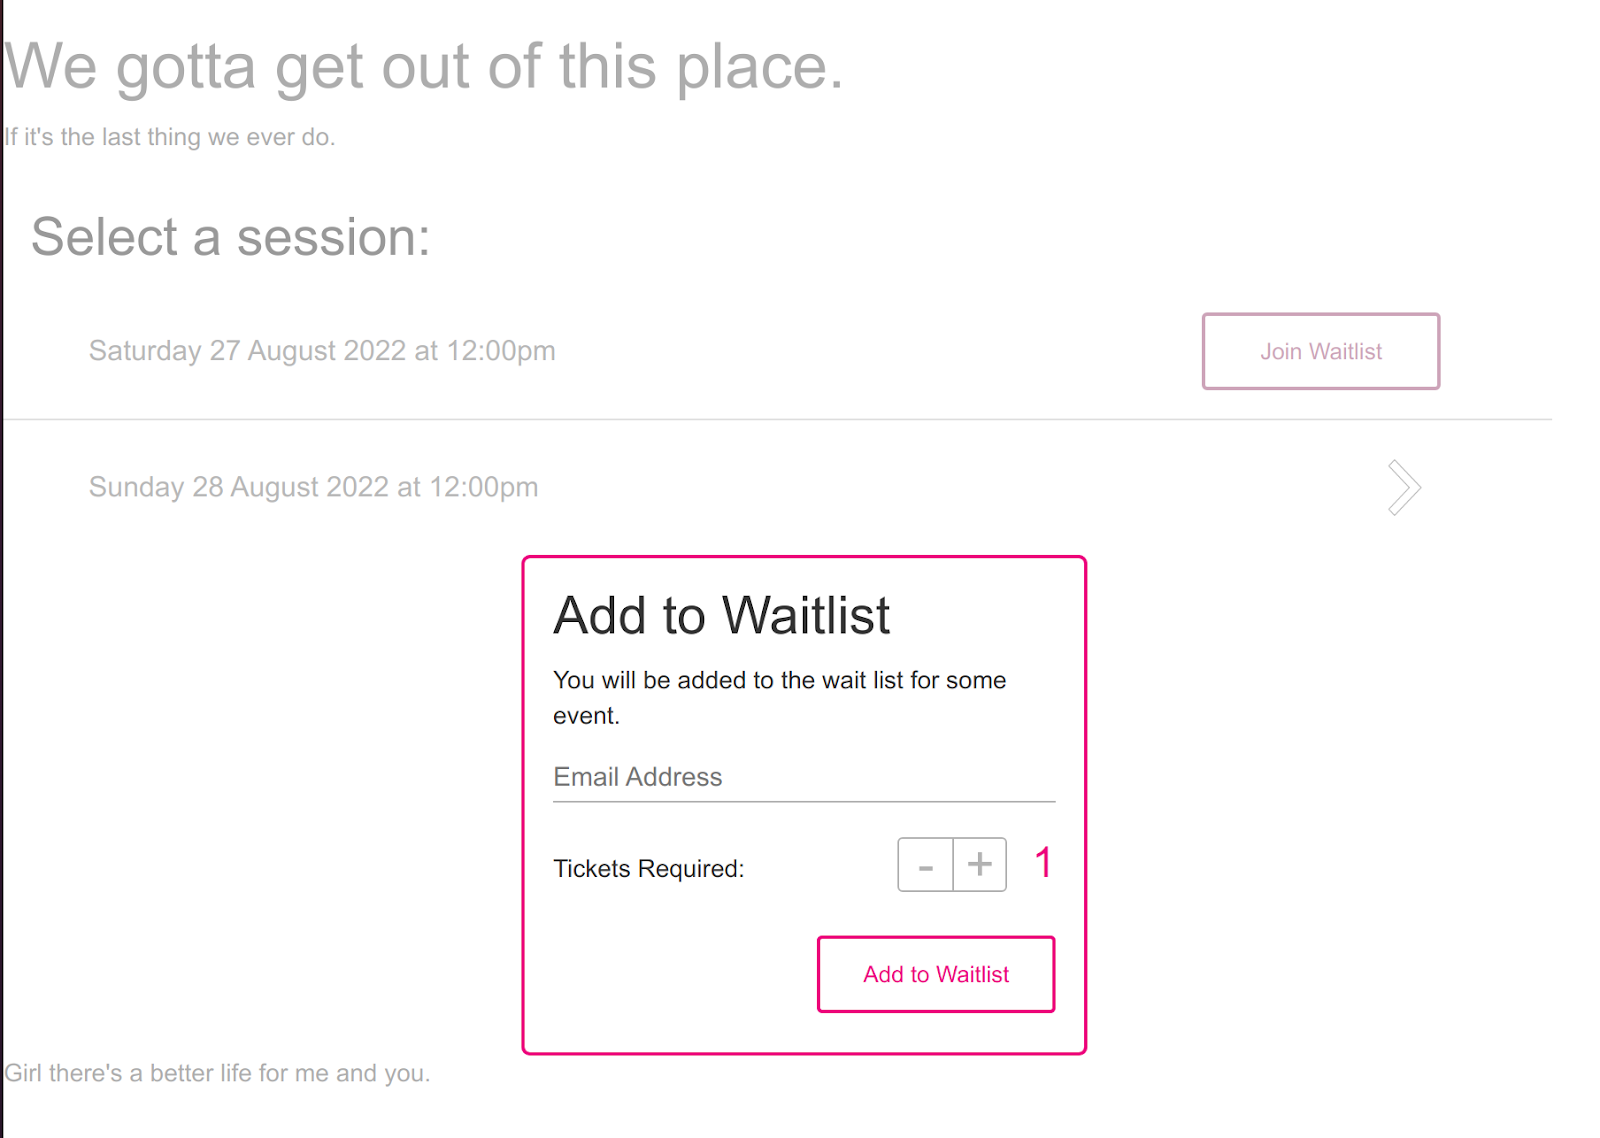
Customers must provide an email address to join the waitlist, and specify how many tickets they would like to buy. This information is extremely useful as it might result in an extra session being added, or additional tickets to the original session being made available.
When the customer joins the waitlist, they get an acknowledgement on screen.
You can manage the waitlist in the admin panel
On the Event Summary page there is a WAITLIST Button that relates to each session.
After clicking the waitlist button, a pop up appears with a table with a row for each customer:
- Date joined waitlist
- Email address
- Notify button - which sends an email notifying the customer that tickets are now available with a link back to the event*.
*Tickets will have to be turned back on with an allocation available for sale in order to use the notification button.
Reporting
A Waitlist report will be available in the report area with the following details:
- Date joined waitlist
- Number of tickets requested
- Session date requested
- Email address
- Date notified tickets available