Creating a seating plan
Building your own seating plan is possible using the IWannaTicket seating plan editor feature. This article provides you with a detailed guide presenting alternative methods for designing and uploading your seating arrangements to our platform.
You have three options when designing a seating chart for your event.
Option 1 - Use the IWannaTicket Seating Plan Editor
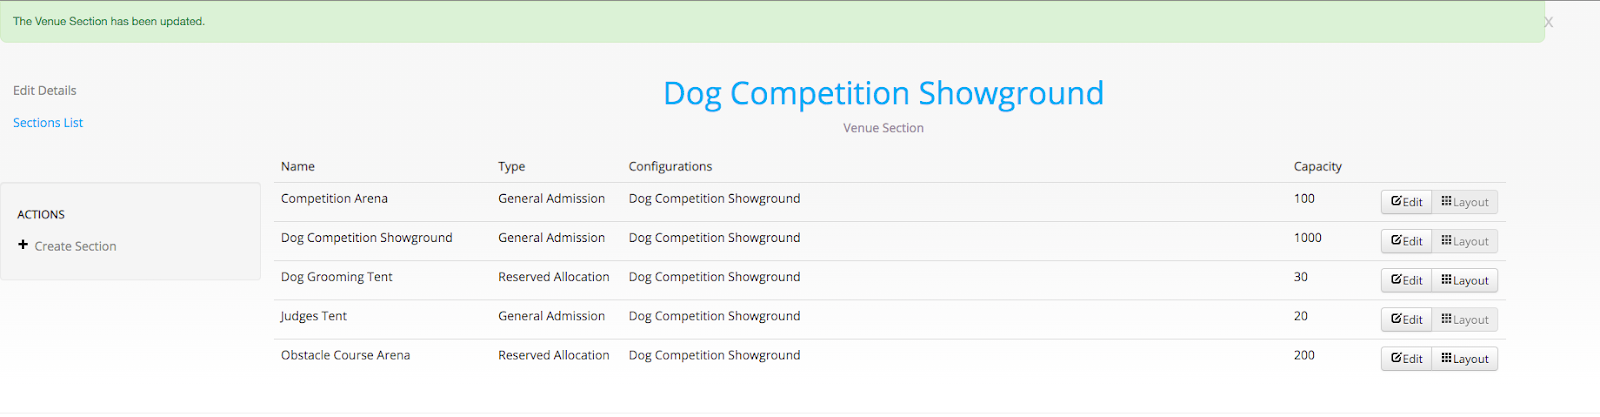
1. Locate your Venue Sections that are configured with an Allocation Type of ‘Reserved Allocation’.
Main Article - What are venue sections?
2. Click on the ‘Layout’ button for the Venue Section you want to build the seating chart for. Below you will see that the Dog Grooming Tent and Obstacle Course Arena are configured for Reserved Seating as the Layout buttons are not faded.
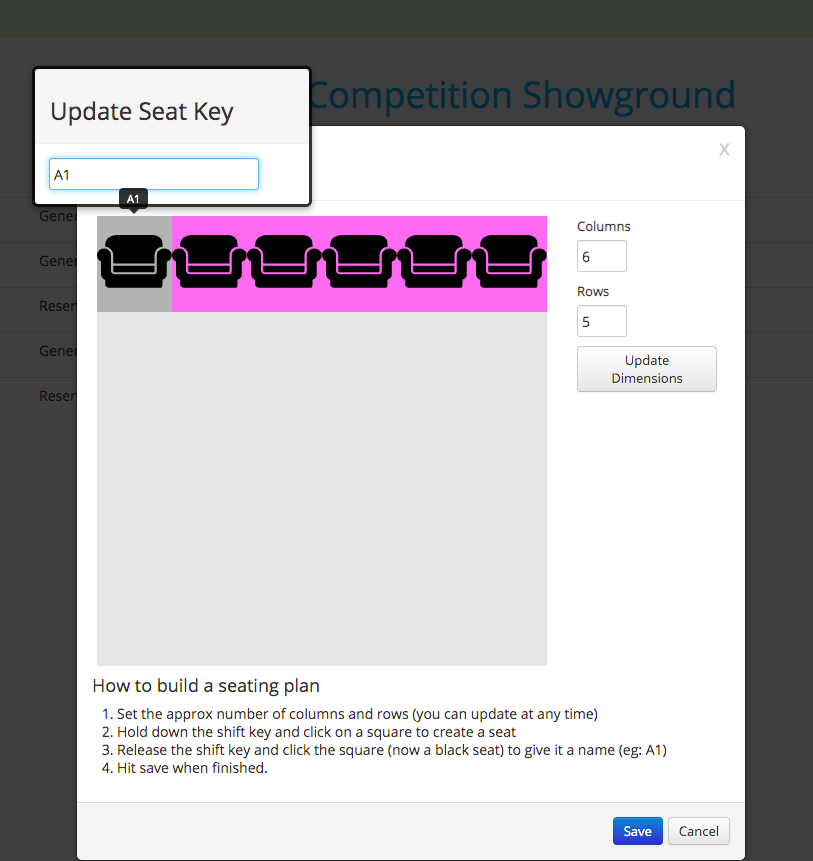
3. After you select ‘Layout’, the Seating Plan Editor pop-up will appear.
In this example we have used the Venue Section ‘Judges Tent’ with a capacity of 30 seats.
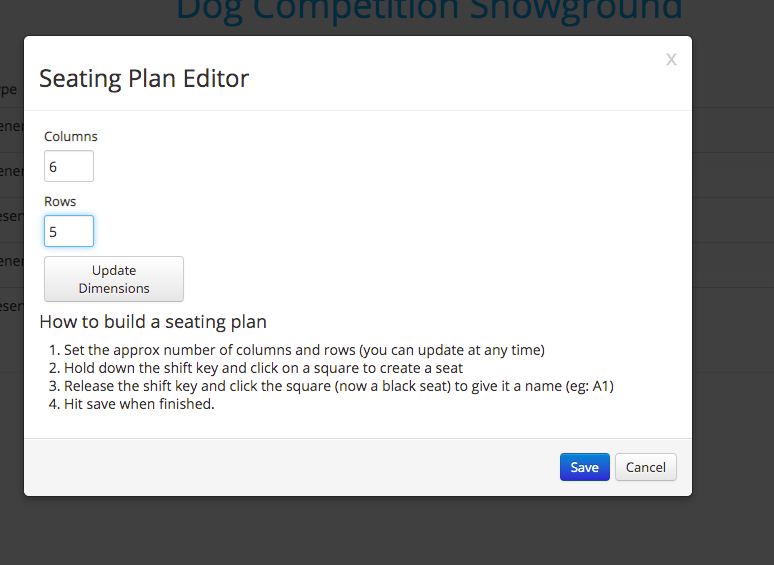
4. Fill in the text-box for the number of columns and rows. This needs to accurately reflect the seating arrangement that you have in that particular venue section.
5. Click the ‘Update Dimensions’ button, a large grey square will appear.
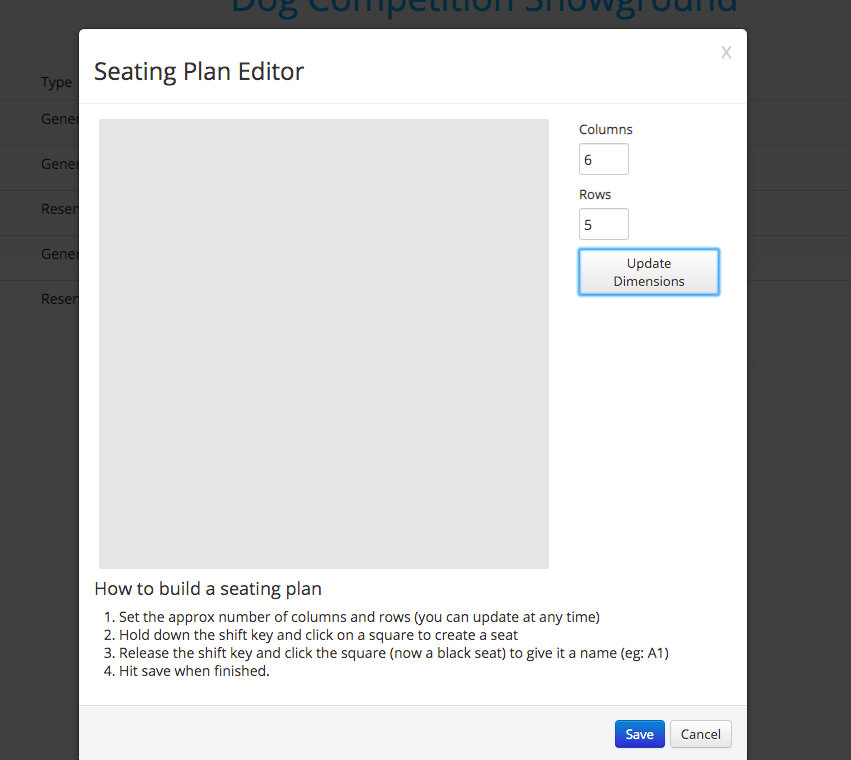
6. Hold down the Shift key on your keyboard and click on the squares to create the actual seats that you want to go on sale.
In this example, we have selected all 30 squares as there are 30 seats available in the Venue Section.
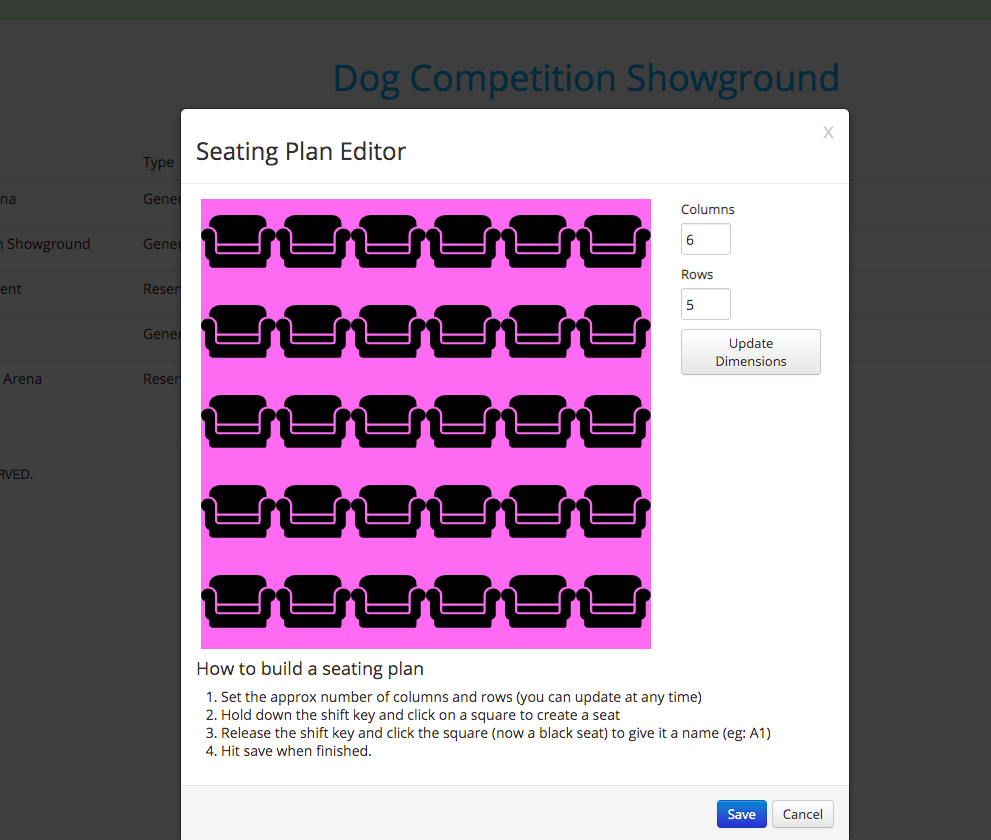
7. Release the shift key and click the square. The pink squares will disappear and you will be left with a black seat. Name the seat based on how the seating is labelled in your venue. (eg: A1).
8. Click the blue Save button once all of the seats have been labelled.
Option 2 - Designing the seating plan using Excel spreadsheets
The alternative method is to manually create the seating plan using an Excel spreadsheet exported as a CSV file so that we can upload it into your account.
- Open an Excel spreadsheet.
- Paste the formula =CHAR(COLUMN()+64) & ROW() into every cell that you want to represent a chair.
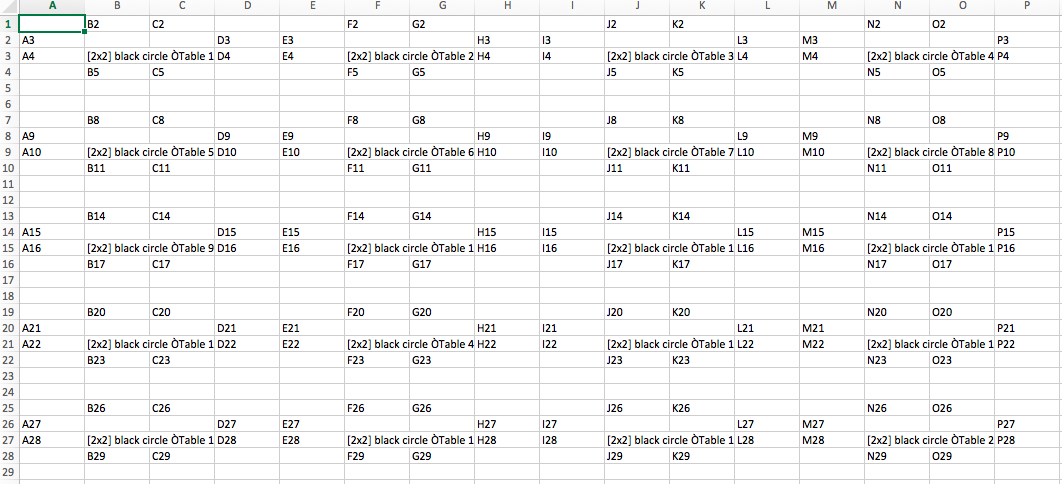
For example, if you had 5 rows of 5 seats each it would look like the below.

Option 3 - Designing a seating plan where the seats are positioned around tables or a stage.
1. Edit the formula [2x2] black circle “Table 1” based on how you would like the shapes to be configured. By shapes, we are referring to objects in the seating plan such as emergency rows, aisles, tables and stages.
[2x2] black circle "Table 1"
You will need to customise the above formula based on the desired dimensions of the shapes.
- Inside the square brackets [ x ] put the dimensions of the shape.
- The colour can be any colour from the CSS colour list.
- The shape can be any shape.
- The word inside of the “ “ is the text that will appear on the seating plan for the ticket buyer when they hover over the shape with their mouse.
2. Paste the correct formula into your spreadsheet into the correct space on your spreadsheet.
3. Configure the seating around the shape based on the organisation of the seats in the space.
For example in the example below we have used 1A, 1B, 1C etc to convey the seating for Table 1. For “Table 2” you would use 2A, 2B, 2C.

4. Repeat these steps based off of the number of seats and shapes that feature in your seating plan.
5. Remember to change the name of the Table each time in your formula so that your attendees know what table number they are booking onto.
Below is an example of a completed large seating plan.
6. Save the final version of the sheet. Then, export it as a CSV file and email this to support@iwannaticket and ask that the layout be applied to that section. You will need to let us know the section name that you want us to apply the seating chart to.

Alternatively, if you would like us to build your seating chart for you - please allow our team 3 business days to upload and build the chart based off a provided diagram of your seating arrangement. Please contact us if you would like further information about this.
If you require any further assistance, please get in touch via support@iwannaticket.com.au and your Account Manager will be able to provide additional information.