Installing EPSON TM T20 Thermal Receipt Printer
The instructions below are for installing the Epson TM-T20 printer connecting to a Window PC using a USB connection.
You will need to install the software and drivers before connecting the printer and turning it on.
Installing the Printer Software
- Download the TM-T20 Software & Document Discs
Link to Download Software - https://support.epson.net/setupnavi/?PINF=swlist&OSC=WS&LG2=EN&MKN=TM-T20
The TM-T20 home page - https://support.epson.net/setupnavi/?LG2=EN&OSC=WS&MKN=TM-T20&PINF=menu&linkflg=alllist
-
Extract the Zip file.
- In folder TM_T20_CD800, double click ‘TMInstallNavi’ file.

- The Installation will begin.
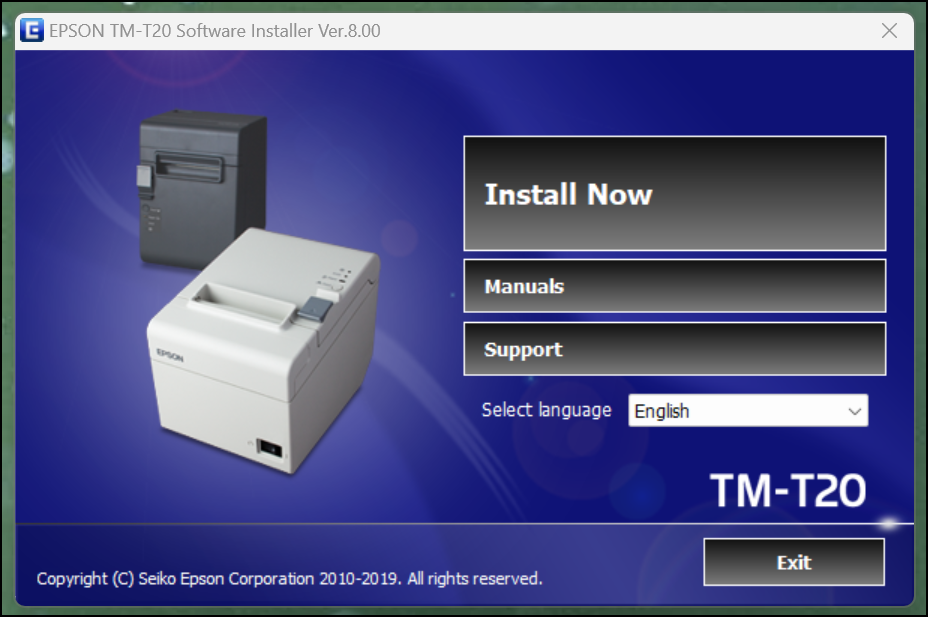
- Click ‘Install Now’
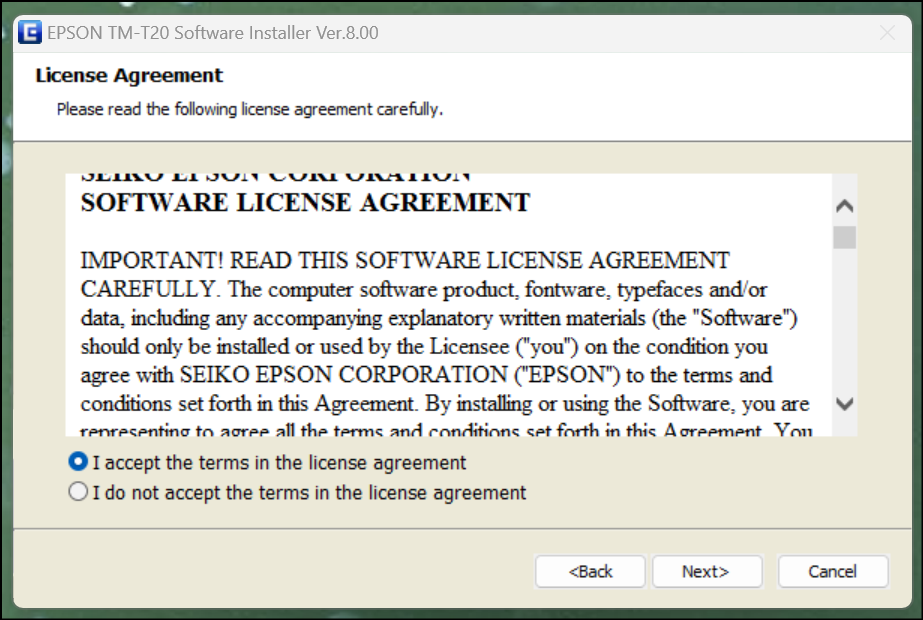
- Read and Accept the license agreement to continue.
-
Click ‘Next>’ to continue
- Select ‘Easy Install’
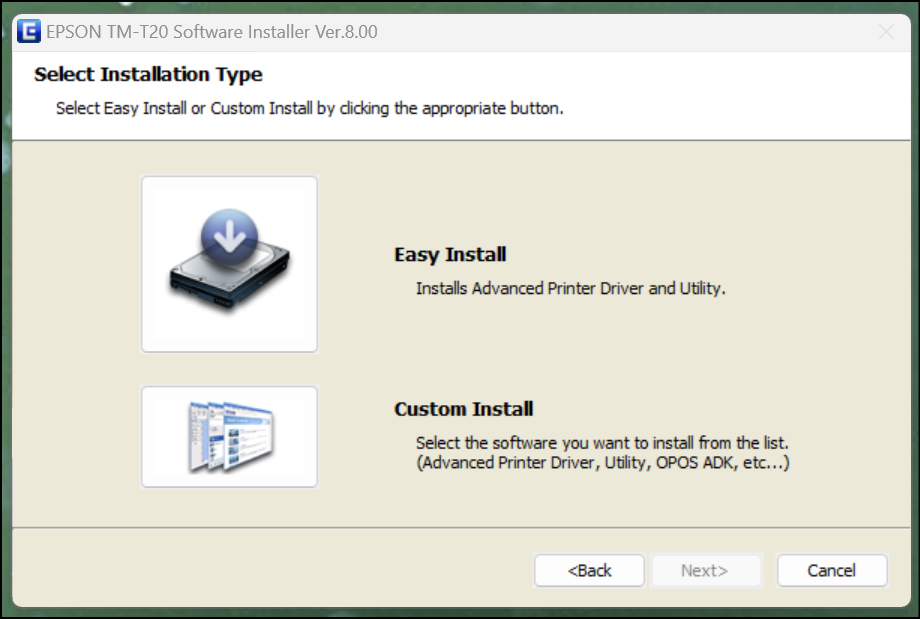
- The install will continue to next page.
-
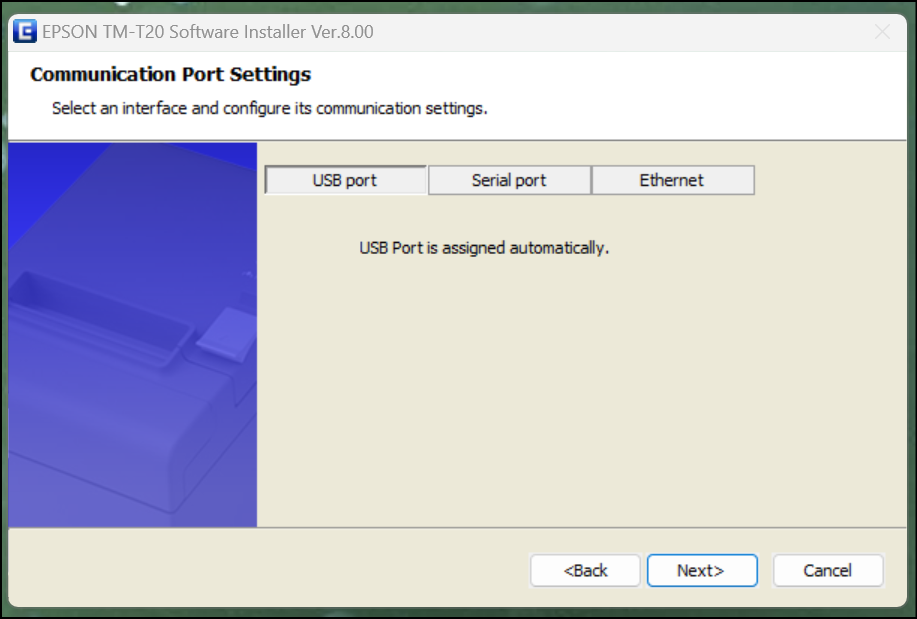
Ensure ‘USB port’ is selected before clicking ‘Next>’ to continue
- The screen will then display the name and location of files to be installed.

-
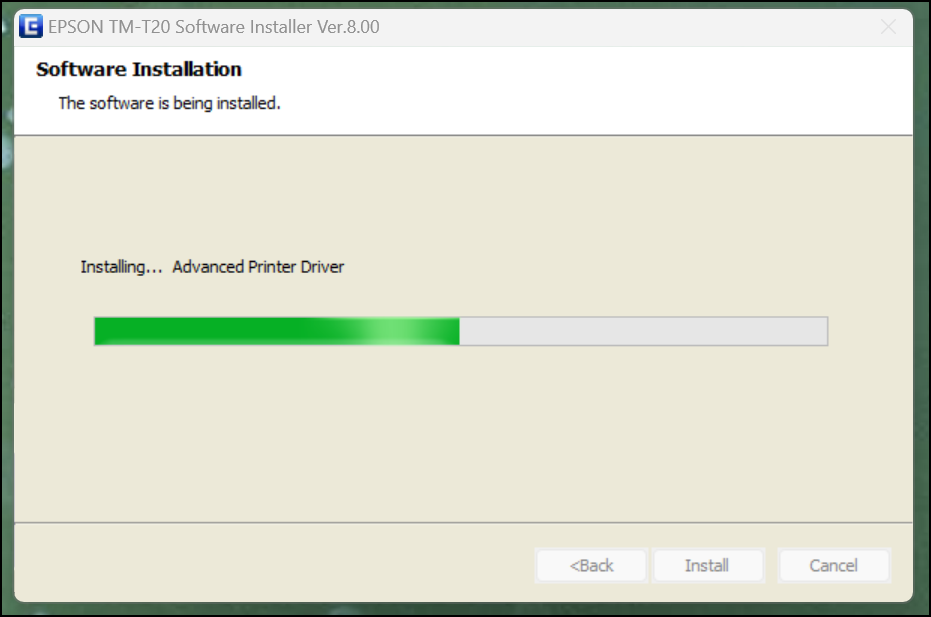
To Continue, click ‘Install’
- The installation will start to instal the software.
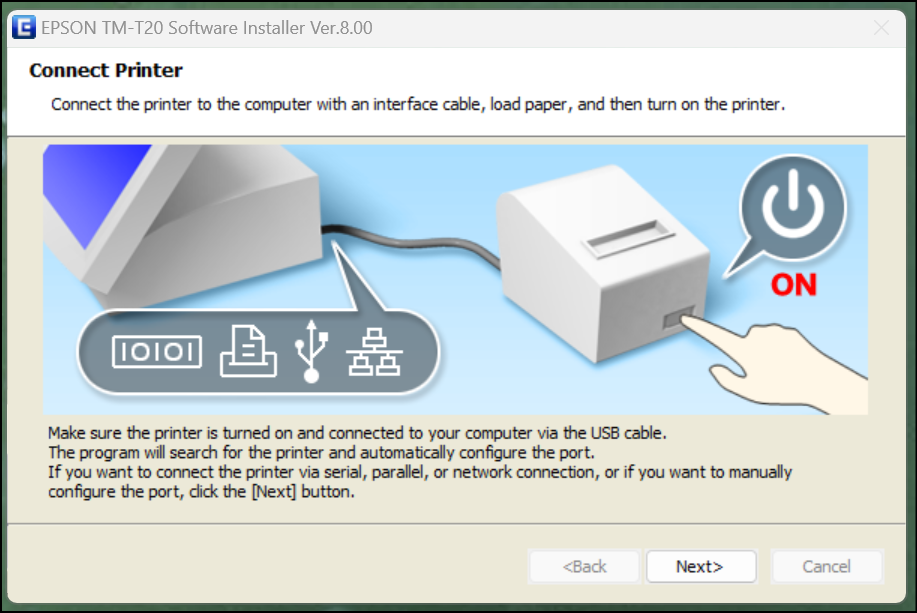
- Once completed, you will be instructed to connect the printer to your computer and turn it on.
- Once connected and turned on, the installation will be completed and you will be shown the installation complete screen with the option of printing a test page and to run the utility.
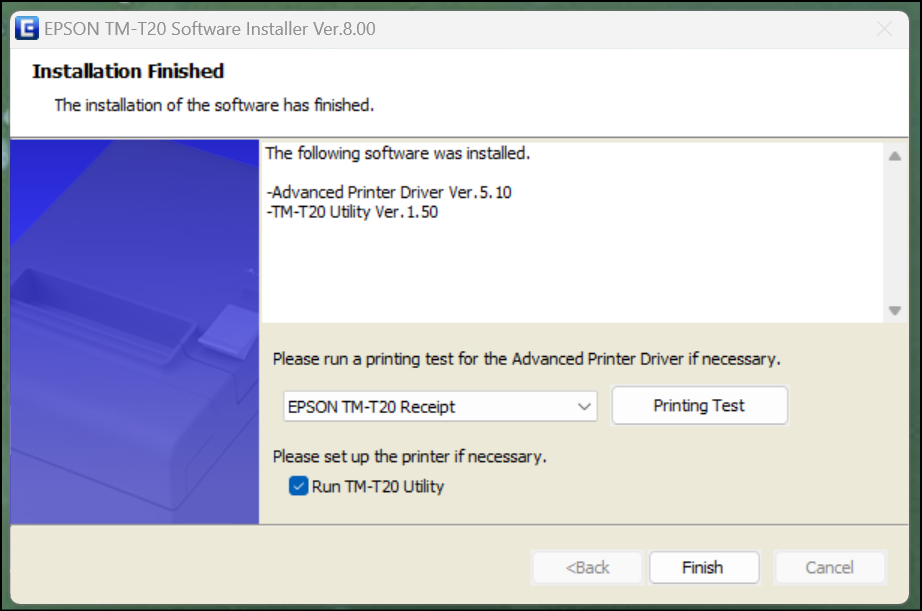
- Selecting test print, will print a sample of text.
- For more advanced installation options, you can run the TM-T20 utility however this is not necessary for printing with IWT Admin.
- You are now ready to use the Epson TM-T20 printer.
To Enable Automatic Ticket Printing
When using the printer to print tickets and receipts at the box office, you are able to configure your browser to ‘Offer to print the tickets’.
When ‘Offer to print the tickets’ is enabled, a popup browser window will be displayed with the thermal tickets ready to be printed.
-
Select the print icon.
- Ensure the Thermal Printer is selected as the Destination.
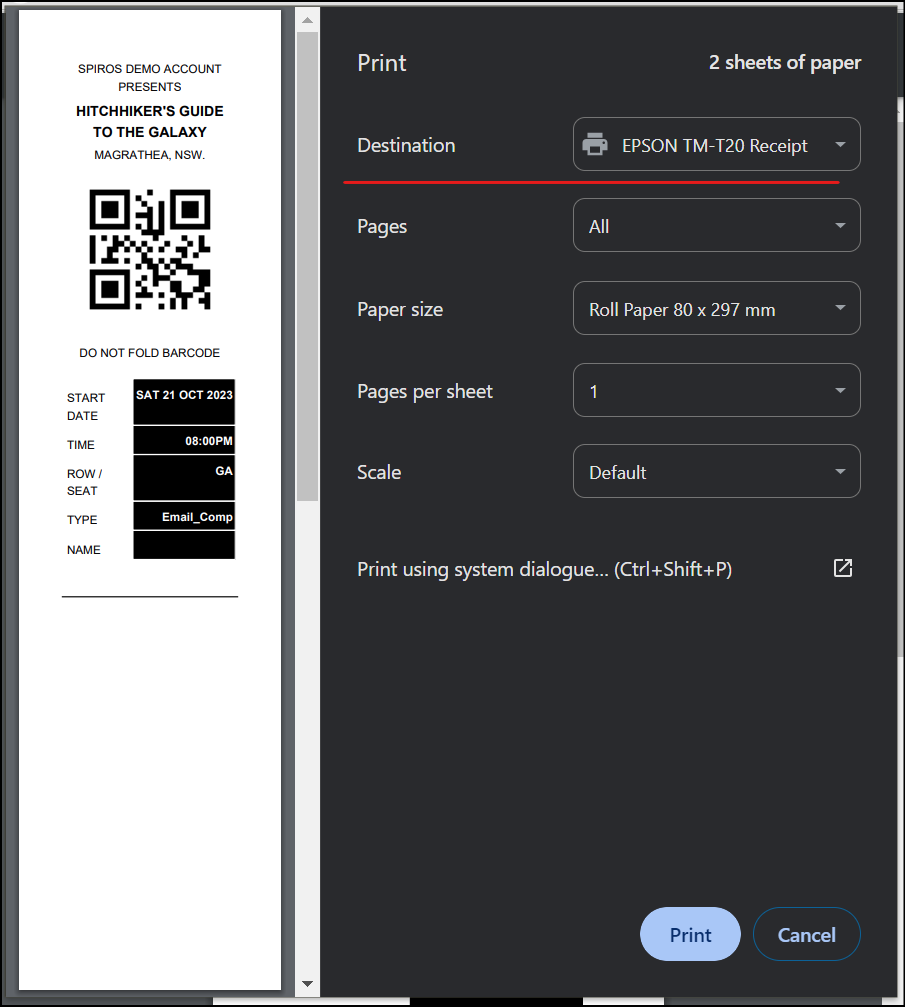
- Select ‘Print’.
If you require any further assistance, please get in touch via support@iwannaticket.com.au and your Account Manager will be able to provide additional information.